Tuesday 29 January 2008

2. Use a plain background

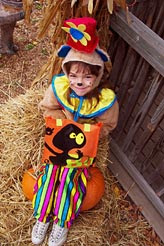
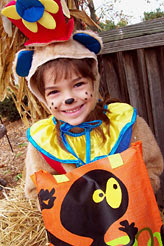
A plain background shows off the subject you are photographing. When you look through the camera viewfinder, force yourself to study the area surrounding your subject. Make sure no poles grow from the head of your favorite niece and that no cars seem to dangle from her ears.

Right picture is Distracting background.
Left picture is better one.

1. Look your subject in the eye

Too highBetter PhotoDirect eye contact can be as engaging in a picture as it is in real life. When taking a picture of someone, hold the camera at the person's eye level to unleash the power of those magnetic gazes and mesmerizing smiles. For children, that means stooping to their level. And your subject need not always stare at the camera.

All by itself that eye level angle will create a personal and inviting feeling that pulls you into the picture

Right picture is too high.
Left picture is better one.

Thursday 24 January 2008

Making A Photo Album or Journal

Planning Your Trip
Before you leave home, decide where you want to visit. Review a PhotoSecrets guidebook, other guide books, magazines, tourist information literature, brochures, and other information and find out what you can't miss. Then draw up a preliminary itinerary.

Test your camera and polish your skills by setting yourself some practice assignments. Use the preceding "How To Photograph Anything" section for techniques to work on. Try different lenses (you can borrow from friends or rent from a good camera store) to find out which ones you need.
While You're Traveling
Start with the end in mind. Always think how your shots will work in an album or journal. You'll be narrating a story at the time so take photographs for 'chapter headings', ones designed to introduce locations and sections. Look out for signs of place names and directions.

Many of the fun times occur between sights so capture these with 'ordinary' shots - in a car, waiting at a bus stop or train station, in the hotel room, eating at a restaurant, and with the people you meet. Tell a story with your photography and create a visual variety of views, people shots, and fun stuff.

Collect memorabilia of the trip. Tickets stubs, timetables, postcards, restaurant receipts, napkins with logos, and hotel brochures. You can use these later to liven up your album or journal. Make notes of your travels and sketch a map showing your route. If you might enter some of your shots in photography competitions, keep a note of the camera settings you use (f-stop, shutter speed, film type and lens size).

Keeping A Journal
Decide beforehand how you're going to organize the journal (usually by date) and stock up with enough books or paper to last the trip. Try to write something each day, particularly funny stories and irreverent remarks people made. Include the date and location. Ask your companions to contribute notes every now and then.
Getting Home
Assign a free evening and edit your shots. Don't be afraid to throw the weak ones out. The more you edit, the higher you're average quality will be. Sort them into subgroups by subject or location, and then sort each subgroup.
Making An Album
Buy a good quality album, with refillable pages and thick paper. You'll need to know your print size (usually 4 inces x 6 inches).

As you install the prints, consider each spread as a single story or subject. Paste in postcards, brochures and other memorabilia to highlight the story. Crop some photographs by cutting out unnecessary elements, or trimming around a figure.
Enlargements
A great way to remember your trip, and to let people admire your photographic skills, is to get enlargements made of the best shots. They come in standard sizes (5x7, 8x10, 11x14). A good tip for some revisionist improvements is to crop digitally before you print. You can also crop manually -- enlarge your shot to one size larger, then crop the print down (use a sharp knife and a metal edge) for an even tighter shot.

It takes extra time, cost and effort but enlargements are the most admired result of your skill and art.
Newsletters
Use your shots to illustrate a newsletter of your trip to your friends and family. Cut up spare prints, stick them on paper and make photocopies (black and white, or color). Use a word processor or page layout program for a professional presentation. You could also make your own posters, key rings, refrigerator magnets, note cards, and seasonal cards.
Web Site
Build your own web pages, showing the world the wonderful time you had.

The F-Stops Here

A camera is your media, so the better you understand the media, the better your pictures are likely to be. The two most useful controls are:
1. Focal Length (the zoom of your lens), which affects how much of the view is included in the shot, and;

2. Depth-Of-Field (the f-stop of your lens), which affects how much of the foreground and background is in focus.
To use these techniques effectively, you need to understand lenses and exposure.
Lenses
The first thing to play with on most cameras is the lens. A long lens (say 210mm), allows you to zoom-in to your subject, to get close to it. A short lens (say 35mm), is often called a wide-angle lens because it allows you to zoom-out and get a wider view.

The numbers (e.g. 210mm) represent the focal length of the lens. This is the distance between the focal plane (film) and where the light rays appear to originate (when focused on infinity).

You can select the focal length based on what you want included in the shot, and how you want to portray depth. A short lens exaggerates depth, combining a close foreground with a deep background. This is a popular pro technique where a close foreground (flowers or roadway) sweeps back into the far horizon. To do this (called hyperfocal) you need a wide lens (say 20mm to 28mm) and a wide depth-of-field (small aperture such as f22 - see later).

A long lens on the other hand contracts the image, giving it narrow depth. Distant elements are put on the same focal plane, making them look closer together than they really are. This is useful to create a flat image, or to emphasize the scale of your background relative to your foreground.

Exposure - Four Factors
A camera is just a box with a hole in it. The correct exposure is determined by four factors:
1. How large this hole is (the aperture);
2. How long it stays open for (the shutter speed);
3. How quickly the camera reacts (the ISO), and:
4. How much light is reflected off the subject (the light level).
Fortunately, most cameras are automatic and will make all these decisions for you. However, higher-end cameras allow you to intervene to create particular effects. Its useful to understand how these four factors interact so that you can use them to your creative advantage.

Let's review each factor in turn (in order of usefulness) and see how it can improve your photography.

1. Aperture
Inside the lens is an adjustable device, the diaphragm, which alters the size of the opening - the aperture. Changing the aperture is useful as it has a handy side-effect. A very small aperture makes everything (background and foreground) in focus. A large aperture makes only the subject you're focused on in focus. Try squinting your eyes (everything is in focus) and then opening them wide (some things are blurry).

This zone of acceptably sharp focus extends both in front of and behind of the point of focus. It's called the depth-of-field. With landscapes, we usually want a wide depth-of-field to get both the background (hills or mountains) and the foreground (a flower or your travelling companions) in focus. With portraits, we want to emphasize the foreground (a person's face) so we make the background blurry by using a narrow depth-of-field.

How can you tell how much of the image is going to be in focus? The depth-of-field is affected by three things: the size of the aperture; the focal length of the lens; and the distance to the subject you're focused on (the focal distance). To make things easier, the first two items are combined to give us a field number, or f-number. The bigger the f-number (say f11 or f22), the bigger the depth-of-field (the wider the zone of focus).

2. Shutter Speed
Inside the camera is a mechanism (a shutter) which controls how long light is allowed to act on the film. When you take a photograph (by pressing the shutter-release), the shutter opens and then closes a fraction of a second later. How quickly this is done is called the shutter speed and is measured in seconds (shortened to s). A fast shutter speed (say 1/500th of a second) is good for action shots as it freezes movement. A slow shutter speed (say 1/60s) blurs moving objects, which is useful when you want to emphasize movement and speed.

Most of the time you will select a shutter speed based on the size of your lens. This is because when you hold a camera, you introduce unwanted movement, called camera shake, and how much of this shake is noticed on the photograph depends upon how much you are zoomed in.

A good rule of thumb says that you're safe with a shutter speed equal to, or faster than, the length of your lens. For example, with a wide lens of 35mm, you're fine with a shutter speed of 1/60s. But when zoomed in to 210mm, you need a faster shutter speed of 1/250s.

3. Light Level
The amount of light is usually set by mother nature. Generally, the brighter a view is, the better the photograph.

If someone is in the shade, you can add light to their face by using a flash unit. This is called fill-flash because it fills in some light. You can do the same thing with a reflective surface, such as white card or a purpose-made reflector.

If a sky is too bright, you can reduce the amount of light with a filter (such as a gradiented neutral-density filter).

4. Camera Speed
How quickly the camera reacts to light is known as the speed. Digital cameras often have several speeds available, known as "ISO" settings, which can be chosen manually or automatically. ISO stands for the International Standards Organization which developed a system for film where a 200 ISO is twice as fast (i.e. it reacts twice as quickly) a 100 ISO. (You may have also heard of ASA or DIN - these were two other standards which were replaced by the ISO.)

Why not just have a fast ISO? There is a trade-off between speed and quality. Generally it is preferable to use a slower speed (say 100 ISO) as it gives a sharper image (a finer grain). But when there isn't enough light (indoors or at night), you'll need a faster speed (say 400 or 1600 ISO) and will have to suffer it's less-distinct image (coarser grain).

Combining the Four Factors
To get the optimum exposure, you must consider all four factors - aperture, shutter speed, light level, and camera speed. Always remember that these four factors are all interrellated. When you set one, you must juggle the others to get the right exposure. Usually you'll be balancing your preferred aperture with a suitable shutter speed.

For example, say you're shooting a landscape with a 100mm lens set to f5.6. When you activate the light meter in your camera, based on the light level and the film speed, it recommends a shutter speed of 1/125s. So your factors are: f5.6, 1/125s, a fixed light level, and your film speed. The f5.6 aperture is giving you a medium depth-of-field - a blurry foreground to a sharp background.

Now lets say that you want both the background and the foreground elements to be in focus. You therefore select a larger f-number, going up a stop from f5.6 to f8. This halves the aperture, so, to compensate, you need to double the shutter-speed from 1/125s to 1/60s. You have successfully juggled your factors.

Unfortunately, this has now taken you past the slowest speed for your lens when hand-held (100mm => 1/100s) and will make a blurry image due to camera shake. So you either need to change to a wider-angle lens (say 50mm), change to a faster film, or find some support for your camera such as a wall or tripod.


SummaryEnhance the creativity of your photographs by intelligently choosing the length of your lens and its aperture.

Wednesday 23 January 2008

What To Take Equipment (continue...)

Here are some other filters.
Color Enhancer

Enhances reds, but can leave a cold blue/violet cast and is expensive.

Color Correcting

Enhances particular colors - green is good to enhance foliage. For example, a CC20G adds 20% green by reducing other colors by 80%.

Single Color

Add an overall blue, orange or sepia cast to your shot.

81A, 81B or 81C

Simulates late afternoon light by adding an orange/brown cast. A is light, B medium, and C strong.

Haze 1 or Skylight 1A


Can reduce haze at high altitude. Skylight 1A adds a slight pink "warming" cast. Used often to protect lenses.

Neutral Density or Split-Field Neutral Density

Reduces the brightness of a scene, for better control of aperture. A split-field neutral density reduces a bright sky to match a shaded foreground.

Red or Yellow

Increases tonal contrast in black-and-white photographs.

4. Extra Photo Storage
If you're going on a long trip, you'll be taking lots of photos, so you'll need some way to store those pictures. Depending upon what type of camera you have, take extra "flash" memory cards or film, a photo hard disc, or laptop.
5. Camera Care
Dirty lenses or filters produce low-contrast images and washed-out colors. Keep things clean with a soft lint-free cloth, special dust-free tissues, lens-cleaning fluid, and a blower brush. A pair of tweezers is useful if sand or dirt gets lodged inside the camera. A small screwdriver can tighten up any screws that come loose, particularly on long lenses which don't like the vibrations of traveling.
6. Flash
A flash is useful for brightening people's faces on overcast days, and for indoor shots. Many cameras today include a built-in flash which is suitable for most purposes. If you're keen on interiors, consider a hand-held flash to brighten dark areas while the shutter remains open. Remember that many museums prohibit flash units as they can damage the exhibits.
7. Second Camera
If you have it, also take a compact camera, or a disposable camera. This is great for restaurants and quick snaps of unsuspecting friends in embarrassing situations. Many professionals carry a second SLR in case one jams or they're shooting with two different films. But that's a little extreme.
8. Tripods
A full-size tripod is essential for steady, top-quality shots, but is too cumbersome for most travelers. Instead carry a mono pod, or a mini-tripod - coupled with a wall or table, they're almost as good.

If you have a tripod, you'll also need a cable release to avoid camera movement when you take the shot. Alternatively use the self-timer feature.
9. Notepad and Pen
Useful for remembering good locations, bus numbers, details about your subjects, and addresses of people you meet. If you're considering submitting shots for competitions, you'll need to note your camera settings.
10. Batteries
If your camera uses rechargeable batteries, don't forget the recharger. If you're going overseas, you might need a voltage/power convertor. Take a second, spare rechargeable battery, so you can keep shooting.

It's easy to avoid buying spare batteries but there's nothing more infuriating than getting somewhere fabulous and finding out that your camera won't power up. As Gary Larsen (almost) said, just when you find the Loch Ness Monster, Bigfoot, and Elvis, all sitting together, your batteries die.

What To Take Equipment

Standard Camera
A 'compact' or 'point-and-shoot' automatic camera makes life very easy as it is small and simple to operate. In fact, they're even preferable over more expensive 'SLR' cameras in some circumstances, such as when you need fast response, something less noticeable and intimidating (for photographing people), or something small and light (when walking around town or hiking). Some models have one fixed lens (usually a 30mm wide angle) which is the lens you'd use most on a more expensive camera. Other model also offer a second, telephoto lens, or a single zoom lens to help you capture details and make good portraits of people.

Look for a model that feels good in your hands and that you can understand how to operate. I like a very wide angle lens (24mm) to capture buildings and make big, punchy shots. A fill-flash feature is very useful to brighten people's faces. Other useful features include lockable autofocus (to focus on subjects which aren't in the center of the frame), a self-timer, and panoramic mode.

A Camera for the Experienced
The 35mm camera of choice for experienced photographers is the SLR - Single-Lens Reflex. This type of camera contains an angled mirror and prism to show you exactly the scene viewed by the lens. This is a benefit over the simple point-and-shoot camera (which has a separate viewfinder lens) as it allows you to better monitor the image.

The greatest benefits of an SLR camera is the ability to change lenses according to the situation, and to have manual control over focus, aperture and shutter-speeds. SLRs are typically more cumbersome, expensive, and technically demanding than a compact camera, but you are rewarded with increased flexibility and control.

Look for a model that feels comfortable and that you understand how to operate. I like a built-in flash, auto-focus capability, and aperture-priority mode (where you set the aperture and the camera determines the corresponding shutter speed). A light-weight design is valuable when you're traveling.

1. Lenses
Most people start with a medium zoom lens, such as 35-80mm or 80-135mm, then a telephoto 100-210mm. The lens I use the most is a 24-35mm as you can do so much with it. About 80% of my photos are taken with a 28mm lens. Many professional like a 20mm lens, the exaggerated perspective adds great punch and depth to their shots.

A popular 'long' lens is 80-210mm. I prefer a 100-300mm telephoto as that extra 90mm seems to go a long way. You can use a 2x convertor to double the length but there are drawbacks. It adds two precious f-stops resulting in slower shutter speed, and decreases the optical quality by 10-20%. With such a long focal length you'll need a tripod.

2. Cases, Caps and Straps
Lenses are fragile and expensive so protect them with front and rear lens caps. Adding a UV or skylight filter to each lens serves as extra protection. If you're like me and prone to dropping things, it's cheaper to replace a damaged filter than a broken lens.

A strap can be useful for carrying the camera. It keeps your hands free while keeping the camera primed for action. A nice wide strap spreads the load. Personally however I prefer not to use a strap as it just gets in the way. Instead I carry the camera in a padded case.
Choose a camera case that carries all your kit and is well padded. Adjustable compartments and pockets are useful. Shoulder bags are popular but carrying the weight on one side all day can get uncomfortable. I prefer a backpack as it frees up both hands and makes it easier to travel.

Many professionals prefer a bag that also fits around the waist. This way, they have ready access to a range of lenses.

3. Filters
Your choice of filters, as with everything else, is one of personal preference. I use four filters - a standard polarizer, a blue-yellow polarizer, an FL-D filter and an 81B filter.

With the standard polarizer, rotating the filter gives deep blue skies and strengthens colors by removing glare and reflections. The blue-yellow is a good color enhancer, it makes skies electric blue and increases the amount of golden yellow on buildings. I use the FL-D filter on most sunsets and dusk shots as it adds a warm purple color to the sky. The 81B filter is good for warming up shots when you're shooting around midday.

How To Photograph Anything

Buildings
To minimize the angular distortions of looking upwards, always look for a high viewpoint. Ascend stairs, stand on top of another building or the crest of a hill. If you can't get high, stand far back.

Use the widest angle you have (24-30mm). Bright blue skies are to offset the gray of the building. A polarizer cuts down on window reflections. Try to include people for scale and human interest.

Look for interesting details, often around the doorway, columns or windows. Zoom in and isolate the detail. Here the diffused light of an overcast day works best.

Interiors
Stand well back or shoot from outside through a window. The low-light dictate a long exposure, so load up with fast film. Bring a tripod if they're allowed or, if not, find a support (a wall, your friends shoulder, or lean against a doorway). Use a cable release, or the self-timer to avoid moving the camera.

Remember to switch off the flash if it is not allowed. If it is, you can bring up dark areas by firing a hand-held flash into them while the shutter is open. Natural lighting casts shadows for a tranquil atmosphere. Expose for the highlights.

Landscapes
Always have something in the foreground. This gives depth and scale - using a person also adds human interest. Look for a high vantage point such as a hotel balcony, roof-top restaurant, or wall. Late afternoon is usually best. Use a polarizer to enhance the sky. Haze increases with distance and this aerial perspective gives a subtle impression of distance and depth. Ansel Adams declared landscape photography to be the supreme test of the photographer.

Water
With sprayed water, use side- or backlighting for a translucent look. This also works well with smoke, grass and leaves.

Experiment with a slow shutter speed, perhaps 1/30 to 1/4s so that the rushing water creates a soft, romantic blur. I like 1/8s. A tripod or other support is necessary. Be careful with a polarizer - it can enhance the colors but it also removes reflections that you may want.

Sunsets
The best times are when the sun is just about to touch the horizon, and the afterglow 10-30 minutes after the sun has set. Usually automatic metering works fine, but with high contrast, meter off the brightest part of the sky. Try adding a person in the foreground (they'll appear as a silhouette) for human interest, depth and character. Either include a reflection from the ocean, or eliminate the scenery and keep the horizon low in the frame. A zoom lens is useful and you'll need a tripod or wall for support as the shutter speed will be slow.
Dusk and Night Shots
Dusk shots are best about 15-30 minutes after sunset, when there is still some color in the sky. To add depth, shoot from one end of a bridge or find some other feature coming towards you. A tripod is a necessity. Auto exposure usually works fine but also try manual exposure using a cable release and the 'B' (bulb - open) setting. Take several shots with 2, 4, 8, 12 and 16 seconds. Use an FL-D magenta filter to overcome the effect of tungsten lights on daylight film, and to add a pink to the sky.

In Bad Weather
Bad weather doesn't mean bad photographs, it just changes your options.

Overcast skies reduce contrast and are preferred for trees and foliage. Colors may appear cool and blueish so add an 81A, B, or C filter to warm up the image. If the sky is boring, disguise it with an overhanging tree, or exclude it completely by raising the horizon in your frame. When low clouds or rain reduce color saturation, try black and white film to emphasize the range of gray tones. You may need a faster film (ISO 200 or 400) since there's less light.

Storms and heavy rain add drama and power to an image. Dusk shots are improved with reflections of neon lights in puddles. Clouds create moving patterns of interesting highlights, particularly when a storm is clearing. Fog make lakes, rivers and valleys look ethereal and primordial.

Rain or snow makes people, kids especially, wear colorful clothing. Cover your camera with a coat, umbrella, or even put it in a plastic bag. In snow, give a slight overexposure (slower shutter speed or '+1') to keep the whites free from appearing dirty gray.

Tuesday 22 January 2008

How To Predict A Rainbow

Rainbows are scientific phenomena which can be accurately predicted. A rainbow occurs when sunlight passes through a fine spray, such as at the base of a waterfall, and is refracted into its component colors - red, orange, yellow, green, blue, indigo and violet.

You can see rainbows in Yosemite at the base of Vernal Fall and Bridalveil Fall in the late afternoon, when you're standing directly between the fall and the sun. A circular halo will form with a 42 degree radius, around a point exactly opposite the sun.

Time Of Day

The most important element to many great photographs is the lighting. Warmth, depth, texture, form, contrast, and color are all dramatically affected by the angle of the sunlight, and thus the time of day. Shooting at the optimum time is often the biggest difference between an 'amateur' and a 'professional' shot.

In the early morning and late afternoon, when the sun is low, the light is gold and orange, giving your shot the warmth of a log fire. Professional photographers call these the 'magic hours' and most movies and magazine shots are made during this brief time. It takes extra planning, but saving your photography for one hour after sunrise, or one to two hours before sunset, will add stunning warmth to your shots.

Plan Your Day
Assuming a sunrise at 6am and sunset at 7pm, and that your spouse/kids/friends suddenly give you the reverence and servility you so obviously deserve, a good day might be:

5am: Pre-dawn: A pink, ethereal light and dreamy mist for lakes, rivers and landscapes.

6-7am: Dawn: Crisp, golden light for east-facing subjects.

7am-10am: Early morning: The city comes to life; joggers in the park.

10-2pm: Midday: The sun is too harsh for landscapes and people, but perfect for monuments, buildings and streets with tall buildings.

2pm-4pm: Afternoon: Deep blue skies with a polarizer.

4pm-6:45pm: Late Afternoon: Terrific warm, golden light on west-facing subjects. Best time for landscapes and people, particularly one hour before sunset.

6:45 - 7:30pm: Sunset: Great skies 10 minutes before and 10 minutes after sunset.

7:30-8pm: Dusk is great for skylines, while there's still a purple color to the sky.

9pm: Night shots, or go to bed - you've got to be up early tomorrow!

How To Get Deep Colors

1. Use a polarizer filter

2. Shoot in the late afternoon

3. Use a 'saturated' camera setting

4. Use a narrow tonal range

Friday 18 January 2008

Advanced Tips

1. Use a Narrow Tonal Range
Cameras can't handle a wide tonal range. When you photograph very bright things and very dark things together (sunlight in water and shadows in trees) the camera will lose all the detail and you'll end up with stark overexposed white and total underexposed black. Instead, look for mid-tones with little difference between the brightest and darkest highlights. Flowers and trees for example are often best photographed on overcast, drizzly days.

Your eye can handle a difference in brightness (a 'dynamic range') of about 2,000:1 (11 camera 'stops'), while some digital cameras can only handle a range of 8:1 (3 stops). Ansel Adams' 'Zone System' divided light levels into 11 'zones' and advised using a narrow zone (or tonal) range.
2. Work The Subject, Baby!
As movie directors say, film is cheap (although it's not always their money!). Work the subject and take different shots from different angles. The more you take, the more likely you are to get a good one. Don't be afraid to take ten shots and edit out nine later. Find different, unusual viewpoint. Shoot from high and from low. It's often said that the only difference between a professional photographer and an amateur photographer is that the professional throws more shots away. National Geographic magazine uses only 1 out of every 1,000 shots taken.
3. Hyperfocal
A popular 'pro' technique is capture great depth by combining a close foreground and deep background. Use a wide angle lens (20-28mm), get a few inches from the foreground (often flowers), put the horizon high in the frame. Using a small aperture (f22) keeps everything in focus (hyperfocal). Use a hyperfocal chart to correspond distance with aperture, or just use the smallest (highest f-number) possible.
4. Expose For Highlights
When a scene has a mixture of very bright and very dark areas the light meter in your camera will have difficulty finding the right exposure. In such high-contrast shots, try to expose for the highlights. To do this, walk up to, zoom in to, or spot meter on the most important bright area (a face, sky, detail) and half-depress the shutter release button to hold the exposure (exposure lock). Then recompose and take the shot. To be on the safe side, take several 'bracketed' shots.
5. Bracketing
SLR only
Always expose for the most important highlight. When in doubt about the correct exposure, take several 'bracketed' shots. You 'bracket' around a shot by taking one regular shot, then a second shot slightly darker (-1 stop) and a third shot slightly lighter (+1 stop). Some cameras offer this as an automatic feature.

How To Photograph People

There are several factors to consider when photographing people:
Location
The first thing to do is find your location. Choose a spot with a simple, medium-toned background. Tree foliage, grass or the ocean works well. For darker skin, look for a similarly dark background to keep the highlight (and thus the camera's exposure) on the face.

Minimize patterns, shapes and colors. Keep that background simple, or include a famous landmark.
Lighting
Get the sun behind you and to one side. If it's bright, put people in the shade (harsh, direct sunlight washes out the face). If it's dark in the shade, use the fill-flash feature to brighten up the face.

The best time is the late afternoon as it gives a nice, warm, golden glow. At other times, with an SLR camera, you can simulate this glow with an 81B or C filter.

A popular technique is to put your subject in the shade, then use fill-flash to lighten up the face. Bring a small reflector or white card reflect sunlight into the harsh shadow areas.

Occasionally, having the sun shine from behind the subject (backlighting) looks good as it creates a halo through the hair, showing form and drawing the face out of the background.

If you're shooting indoors with an SLR, 'bounce' the flash off a wall or ceiling for more natural lighting. A separate hand-held flash is best and can be positioned far enough away from the lens to avoid red eye.

Lens
If you have an SLR, use a 135mm or similar lens for the most pleasing perspective. Use the widest aperture (lowest f-number) to blur the background and highlight the face for a movie-like look. If the background is important, use a small aperture (high f-number) to get everything in focus.

Positioning
Get close. Don't include their full body but zoom straight in to the face. For close ups, crop out the top of the head and overfill the frame. Being at eye level usually works best, so for children, kneel down.

Proportion
Generally try to keep the eyes, not necessarily the head, in the center of the frame. If the person is looking slightly to one side, add extra space to that side.

If your subject is to one side and there's a lot of contrast in the shot, you might need to control the exposure. To do this, zoom or close in on your subject (perhaps a person's face) then press the exposure lock button. Keep this button pressed down while you recompose and take your shot.

Relax Your Subject
Get your subject relaxed and happy. For friends or family, remind them of a silly event. With children, give them something to play with. For local people, ask them about the location, their job or skill, or complement their clothes. People hate waiting while you adjust your camera so always plan the shot and adjust your camera first, before asking people to pose.

Fun Shots
To add fun and action to a shot, hold the camera at an angle - 30 degrees with the right side up works well. It looks as though the photographer was caught off guard, emphasizing danger and action, and is great for parties! Stage a joke shot by pretending to interact with a statue. Or use a wide angle lens to distort the face.

Action
If your subject is moving (on a cable car or bicycle), deliberately blur the background to emphasize speed, excitement and urgency. Track the subject with your camera and, if you have an SLR, use a medium to slow shutter speed (1/60s). This will blur the background and, optionally, also your subject. Using the flash (particularly a 'rear-curtain sync' feature if your camera has one) helps freeze the subject in a moving background.

Don't Forget You!
The problem with being the photographer is that you end up not being in your own photographs. Remind the viewer what you look like and ask someone else to take a shot. You can arrange a photograph by propping the camera on a small tripod or wall (use stones, paper or coins for adjustment) and using the self timer.

Wednesday 16 January 2008

Ten Tips

1. Hold It Steady
A problem with many photographs is that they're blurry. Avoid 'camera shake' by holding the camera steady. Use both hands, resting your elbows on your chest, or use a wall for support. Relax: don't tense up. You're a marksman/woman holding a gun and it must be steady to shoot.
2. Put The Sun Behind You
A photograph is all about light so always think of how the light is striking your subject. The best bet is to move around so that the sun is behind you and to one side. This front lighting brings out color and shades, and the slight angle (side lighting) produces some shadow to indicate texture and form.
3. Get Closer
The best shots are simple so move closer and remove any clutter from the picture. If you look at most 'people' shots they don't show the whole body so you don't need to either. Move close, fill the frame with just the face, or even overflow it. Give your shot some impact. Use a zoom to crop the image tighter.
4. Choose A Format
Which way you hold the camera affects what is emphasized in your shot. For tall things (Redwoods, Half Dome) a vertical format emphasize height. Use a horizontal format to show the dramatic sweep of the mountains.
5. Include People
Photographs solely of landscape and rocks are enjoyable to take but often dull to look at. Include some of your friends, companions, family, or even people passing by, to add human interest. If there's no one around, include yourself with the self-timer.

Have you ever got your photos back only to discover that something that looked awe-inspiring at the time looks dull on paper? This is because your eye needs some reference point to judge scale. Add a person, car, or something of known size to indicate the magnitude of the scenery.
6. Consider Variety

You may take the greatest shots but if they're all the same type or style, they may be dull to look at. Spice up your collection by adding variety. Include landscapes and people shots, close ups and wide angles, good weather and bad weather. Take personal shots that remember the 'being there' - friends that you meet, your hotel/campsite, transportation, street or hiking signposts.
7. Add Depth
Depth is an important quality of good photographs. We want the viewer to think that they're not looking at a flat picture, but through a window, into a three-dimensional world. Add pointers to assist the eye. If your subject is a distant mountain, add a person or a tree in the foreground. A wide angle lens can exaggerate this perspective.
8. Use Proportion
The beauty of an image is often in its proportions. A popular technique with artists is called the Rule of Thirds. Imagine the frame divided into thirds, both horizontally and vertically, like a Tic-Tac-Toe board. Now place your subject on one of the lines or intersections. Always centering your subject can get dull. Use the Rule of Thirds to add variety and interest.
9. Search For Details
It's always tempting to use a wide angle lens and 'get everything in'. However, this can be too much and you may loose the impact. Instead, zoom in with a longer lens and find some representative detail. A shot of an entire sequoia tree just looks like a tree. But a shot of just the tree's wide base, with a person for scale, is more powerful.
10. Position The Horizon
Where you place the horizon in your shot affects what is emphasized. To show the land, use a high horizon. To show the sky, use a low horizon. Be creative.

Tuesday 15 January 2008

For Better Photos

Taking photos is fun. What's more fun, is taking great photos. Then you can really enjoy your new hobby. In this free, "online book," I'm going to reveal how you can improve your photography. Welcome to Photo Secrets Tips For Better Photos.

Monday 14 January 2008

It's me.


The Top Five Photo Mistakes And How To Fix Them

Lackluster Composition
Sometimes just a subtle shift of emphasis is all it takes to turn a throwaway digital photograph into a treasured keeper. Here are the top tips to immediately improving your composition.

* Tip 1: The Rule of Thirds
The "Rule of Thirds" is a time-honored technique professional photographers use to improve composition. Imagine a tic-tac-toe grid over the image you want to take. Use the intersection of those lines to place your subject slightly off center, and bring interest up or down.

* Tip 2: Variety
Take photos at various angles and distances to give you more options to choose from. Also experiment with vertical and horizontal camera orientation -- you may discover that this simple shift yields interesting results.

* Tip 3: Reduce the Background
Eliminate distracting background clutter by getting closer to your subject. Or try using your camera's Portrait pre-set mode. This will keep objects close to you in focus, while blurring the background. You can achieve the same effect, known as a shallow depth of field, by manually adjusting your aperture setting to a low f-number, such as f2.8.


Poor Lighting
Digital photography is all about catching that magic moment when the light is just right. But lighting also provides some challenges. These tips will help, whether you're indoors or out.

* Tip 1: Balance Bight or Dim Light

Digital cameras get "confused" by unbalanced conditions, such as a very bright or dim light, causing the camera to under or over expose your photo.

In low light conditions, try using your camera's night shooting mode, or lower the ISO to 50 or 100 to get rich detail in low light. Use a tripod, or steady yourself against a stable object to avoid moving the camera.

In bright light, try your camera's Beach or Sunshine mode, or manually choose a fast shutter speed to control the amount of light that comes in.

* Tip 2: Shooting Indoors

Avoid using your flash. Instead, provide as much natural light as possible -- open curtains, or even the door. Or use lamps to add light to the scene. Your flash mutes color and casts stark, deep shadows that are especially unflattering in portraits.

Don't place your subject in front of a bright window or they will become a silhouette (although this can be a nice effect when done intentionally). Try placing them off to the side instead, or facing a natural light source.

* Tip 3: Shooting Outdoors

Try to have the sun behind you when you shoot. This will provide the most flattering light to your subject.

Shoot early or later in the day -- dawn and dusk provide lovely light, whereas midday light can be harsh.

Take advantage of overcast days for photography. That's when the light is even, and casts almost no shadows.


Red-Eye
The appearance of glowing red eyes can ruin a portrait of even the cutest child or pet. The red color comes from light reflecting off of the retinas in our eyes. The following quick tips can help get the red out.

* Tip 1: No Flash:
Try not to use a flash if possible -- it is the number one cause of red-eye. Instead, turn on lights or open curtains to add additional light to your scene.

* Tip 2: Look Away From The Light:
Ask your subject to look toward the camera but not directly at the lens or to look into a bright light first.

* Tip 3: Use The Red-Eye Reduction Setting: Take advantage of in-camera red-eye removal. Many digital cameras and photo printers now allow you to remove red-eye or prevent it altogether. Check your digital camera's manual to see if it includes these features.


Blurry Photos
While a photo with a dramatic blur can often be artistic, it can also render a subject incomprehensible. Here are some ways to add clarity to your digital photographs.

* Tip 1: Reduce Shutter Lag
The time between pressing the trigger and the camera taking the picture is called shutter lag, and it can cause blurry pictures. Avoid it by pressing the trigger halfway down until you're ready to shoot. When the right moment comes, press the rest of the way. This strategy is great when you're taking pictures of people (especially kids) or animals. ?

* Tip 2: Minimize Camera Shake

Even the slightest camera movement can cause unclear photos. Use a tripod or brace yourself against a stationary object to hold the camera still. Some digital cameras come with image stabilization, another way to get clear images of moving subjects.

* Tip 3: Use "Action" Mode

Use your digital camera's "Action" shooting mode for sports or other action shots. It automatically optimizes your shutter speed to help capture motion. Or manually increase your camera's shutter speed to achieve the same effect.


Low-Quality Prints

If you plan to print your photographs using a digital photo printer, keep resolution in mind. Resolution is measured in megapixels (MP), and matching the resolution to the print size will help you get clear digital photo prints.

* Tip 1: Use High Resolution
If you plan to enlarge or crop photos before printing, it's best to shoot at the highest resolution possible. But high-resolution pictures take up more memory.

* Tip 2: Low-Res for Email
If you plan to e-mail images or print smaller sizes, like 4" x 6" or 5" x 7" photos, you can stick to 4-5 MP with no problems.

* Tip 3:

Many digital cameras let you select the resolution level, so you can determine ahead of time whether you want to shoot a big file with lots of detail, or a quick snapshot you can post to a website or e-mail to friends and family.

Getting Great Photo Prints From Your Digital Camera

The first step to getting great digital photo prints is to make sure you use a good quality digital camera.

Digital photos are gaining popularity over traditional film photos because of the features and convenience associated with the newer technology. In some cases it's even more cost effective to print your own photos at home instead of taking them to a developer or sending them in.

Here are some words of wisdom for making great digital photo prints at home.

There are really 4 key components to a great printed photo: Image, Printer, Ink, Paper. Each is part interrelated therefore equally important for success.

The image is the starting point for a good photo. There are many different camera models out there, but in general, you will need at least 3.2 megapixel picture taking ability. Some snazzy digital SLR cameras have 8 megapixels or more. The camera should always be set to the highest resolution while taking the shots just in case you want to make enlargements later on.

Image transfer is crucial! Do not just throw the highest pixel image at some paper, you may not be happy with the results.

Sometimes, too high of a pixel count will create unsightly jagged color transitions in your photo and waste a lot of your ink and time. Too few pixels and the photos will turn out very "grainy". It's usually best to stay within the 200-300 pixels per inch range.
For example, if you had a picture taken with a 1.5 megapixel digital camera, a 5x7 inch print is probably the largest size print that would work. Anything larger than a 5x7, may not look good.

However, if you had a picture taken with a 14 megapixel camera, you should be able to print out a 11x14 inch print with excellent results (300ppi), or a "good" looking 16x20 inch print at 200 ppi.

In addition to the digital camera image, there are a few other components that go into making good quality digital photos you'll want to be aware of: Your printer, the ink cartridges you use, and the quality of the photo paper you use. Each component factors into your end result.

What Camera Should I Buy?

I'd recommend one that you understand. Most any camera will take a good picture -- it's controlling the camera that is the problem.

There are so many features these days that the controls can be overwhelming and put you off taking photos. So visit a camera store, play with different models, and see which ones feel right and easy to understand.

Introduction
Fundamentally, all cameras are the same and, given the same settings, a cheap camera will take the same photograph as an expensive camera. The extra money gets you improved image quality and more control over how the picture will look.

A camera is a box with a hole in it. You can make one -- called a "pinhole camera" -- using a shoe box with a window of transparent paper on one side and a small hole in the opposite side. Adding more controls, mainly to do with the lens, produces different types of cameras.


Types
Disposable Camera. These one-time use cameras are easy to carry and take surprisingly good shots. They are great for people shots at parties. You can even get "underwater" cameras, for scuba diving or at a sandy beach.

Compact "Point-and-Shoot" Camera. Perfect for snapshots. I use one for most of my personal shots and a few professional shots. I like a small, pocket-sized camera with a flash (for people's faces), a self-timer (to include myself in the shot), a wide-angle lens (28mm-equivalent for impact), and a panoramic mode (looks cool!). Most people seem to like a big, zoom lens, but I don't as I prefer "wide" shots over "tight" shots, and a bigger lens increases the size and weight of the camera.

SLR. This is the choice of semi-pro and professional travel photographers. The Single Lens Reflex feature -- which allows the viewfinder to look through the main lens instead of its own fixed lens -- allows you to remove and replace the lens. Interchangeable lenses give you more creative control of your shot. You can make a super-wide shot with a 'short' lens, or enlarge a very distant object with a 'long' lens. My favorite lens sizes are 28, 35, 50, 135, and 300mm. You can also control the aperture (the size of the hole) which allows you to decide what is, and what is not, in focus. The downside to the SLR is that you now have more equipment to buy and carry.

Medium- and Large-Format. These are big film cameras -- their size allows you to use larger film, producing a higher quality/resolution image. The equipment is large and heavy and, therefore, inconvenient for basic travel purposes.

Look for a camera with the simplest layout of the features you need and, as with the stock market, only invest in what you understand.


Cameras

Below are my two favorites for each category of digital camera:

10 Tips To Better Photography

Taking a good photo isn't as hard as you may think. You don't need the most expensive camera or years of experience, just 10 simple tips.

Enjoy!


Tip 1 - Use All Your Available Space
Don't be afraid to use all the space in your photo. If you want to take a picture of something, it's ok for it to take up the whole shot with no or very little background showing. Keep distractions out of your shot


Tip 2 - Study Forms
This is a vital aspect to photography. Understanding forms in your photos. Don't see an object, she its shape and its form and find the best angle to photograph it from. Form is all around us and I highly suggest you read as many books on it as possible.


Tip 3 - Motion In Your Photos
Never have motion in your photos if you are photographing a still object. If there is something moving while you are trying to photograph a stationery object, your photo won't turn out anywhere near as well. Also never put a horizon line in the center of your frame.


Tip 4 - Learn To Use Contrasts Between Colors
Some of the best photos have shades of white, gray and black. You can take great shots with just one color on your subject, but the contrasts between colors in a shot is what makes you a great photographer.


Tip 5 - Get Closer To Your Subject
This is one of the biggest mistakes most photographers make, not getting close enough to their subject. Get up and personal and close the distance gap. You can always reshape and resize a good shot but you can't continue to blowup a distant object.


Tip 6 - Shutter Lag
Shooting action shots with digital camera's can be tricky due to shutter lags. What this means is, when you press the button to take the photo, it can take up to a second for the shutter to take a photo, by that time what you were photographing would have moved or changed somehow. This means you have to compensate for shutter lag by predicting what your subject is going to do and taking the photo just before it takes the action you want. More expensive digital cameras don't have this problem.


Tip 7 - Pan
If you are taking an action shot and your shutter speed is slow, pan with the object. Follow through with the subject, from start to finish and one of those shots will be a winner. You have more chance of getting a good shot if you take more then one photo.


Tip 8 - Continuous Shots
To pan like I suggested above you will need a camera that does continuous shots and doesn't need to stop and process after every shot.


Tip 9 - How To Take Fantastic Night Time Shots
Night time shots can be spectacular, almost magical.... if done right! If not they can look horrible. Really horrible. Without adequate lighting, even good camera's can turn out crappy photos if the photographer doesn't know what he or she is doing.


Tip 10 - Study Your Manual
If your digital camera has a special night time mode, read the manual and follow their instructions on how to use it properly.

How To Photograph Fireworks

AddThis Social Bookmarking Widget
How To Photograph Fireworks
By Andrew Hudson


Photographs of fireworks are spectacular, colorful, and fairly easy to do once you know the tricks. For best results, you will need: an SLR camera, tripod, cable release, a long lens, and plenty of patience.


Since you don't know exactly when the fireworks will explode, and you are aiming to capture their trails, you will need to hold the camera shutter open for 2-30 seconds. Compact cameras don't usually offer this long exposure feature so you will probably need an SLR camera with a manual exposure mode often called 'Bulb' (often marked 'B').

To get sharp images, you must keep the camera perfectly still. Propping your camera on a wall, car-top or table may suffice, but nothing beats a good, solid tripod. You'll also need a cable release to activate the shutter without touching and moving the camera.

Waterfront settings are good as you can include the reflections of the fireworks in your shot. Cityscapes, landmarks, or people add context to the shot, but remember that they'll come out as silhouettes, so don't include faces or other details. High viewpoints, upwind from the smoke, are usually best. Get there early to secure your spot and select a lens (usually a telephoto) that will fill the frame with trails. Use the first burst to focus the lens (don't rely on your 'infinity' setting).

To photograph the fireworks, open the shutter, wait for some bursts, then close the shutter. That's it! Take lots of photos (which you can edit later) to get a few good shots. Try different apertures (f8 is the safest) and different zoom settings. Include only a few bursts to fill up the frame; too many will look messy. To reduce the effect of street lighting, cover the lens between bursts with your hand, a black card, or a black cap.

Looking for a truly spectacular shot? You can double-expose your film to include the full moon with the fireworks. (Only a few cameras provide a "multiple-exposure" mode).

Special Effects with a Point-and-Shoot Camera

Question: What are some tricks and special effects I can try with my basic camera?

Answer: Even if you have the cheapest, most basic camera, you can still do many of the special-effects that professionals do with more expensive cameras.

Filters
You can use any filter (colored or distorted glass or plastic that camera shops sell for about $10-$20) but make sure it covers the lens and, if you have one, the exposure window (a small window near the lens) so that your pictures get exposed correctly. Red, orange and blue filters can make striking images while a soft-focus or fog filter adds a romantic touch to faces and water. You can even make you own filter with a colored plastic bag or glass.

Colored Flash
You can also use colored filters over the flash instead of the lens (professionals call these "gels"). For a Halloween party, try using a red filter over the flash to make people look even more scary!

Old World
One of my favorites effects uses a sepia filter. The light-brown color makes your pictures look old and classic.

Mirrors
Magicians use mirrors and you can too. Take a photo of yourself by pointing into a window. Or include both halves of a room by using a mirror in half of the shot.

Shoot Underwater
If you're on vacation at the beach, take an underwater shot while swimming. Place your camera in a clear plastic bag, remove most of the air, and seal well. Now you can photograph underwater! (Be careful, any water entering the bag will damage the camera).

Photographing Memories of a Trip

Tell a Story
Always think how your prints will look when you show them to your friends and relatives. You'll be narrating a story at the time so take shots to illustrate your story. Take photos of your traveling companions before you leave home, while traveling to the airport, and when you get back. Hopefully you'll see a change in your sun tan! Photograph yourselves in front of "Welcome to..." signs to use as "chapter headings."

Take a Small Camera
Despite having a lot of large 'professional' equipment, the camera I use most often with friends is a small, "compact" camera. I have a really tiny model that I can slip easily into a pocket and carry around with me. That way, whenever something unexpected and fun happens, I'm ready to capture the moment.

Photographing People
The most useful tip for photographing people is to get closer. Try and fill the frame with just the faces. Ask your subjects to stand or sit closer together, so there's less "wasted" space in the photo. Turn the flash on, even when you're outdoors, to highlight the faces.

Understand Your Flash
I often see people trying to photograph a live show or concert. Unfortunately this is almost impossible to do with a normal camera. Most on-camera flash units are only effective for about eight to ten feet - anything further away will just appear black on the photo. Whenever you use a flash indoors, make sure that you're between two and eight feet from your subject.


Don't Forget the Fun!
Many of the fun times occur between sights. Capture these with "ordinary" shots - checking in, waiting in line, at the shops, having dinner with friends, with people you meet.

Don't Forget You!
The problem with being the photographer is that you don't appear in the photos. Stand your camera on a wall or table and use the self-timer feature, or ask someone else to take the photo. Chances are they'll have a camera too and will ask you to return the favor!

How Do I Compose A Photograph?

Composition is the key to an interesting photograph. Despite all the technical jargon, photography is essentially an art form, and its most important aspect is composition. To improve your art skills, find photos you like and study them, asking yourself: 'Why exactly do I like this picture?'

Subject. When you take a photograph, identify what the subject is. Answering 'a person' or 'a building' is not good enough. You need to go deeper and specify 'the curves of the body' or 'the crumbling stonework' -- something that activates your senses, that you can touch, feel, smell, or taste. This process is the most overlooked step in photography. Although it may be tempting to simply snap your photos and rush on, I urge you to take time to visually explore the subject and see what appeals to you. Ask yourself: 'What is the purpose of this photograph?' and 'What is the reaction I want a viewer to have?'

Context. Next find a 'context' -- a simple backdrop which adds relevance, contrast, and/or location to the 'subject.' You can add depth by finding a 'context' in a different spatial plane than the 'subject.' For example, if the subject is a building in the background, make the context a flower or person in the foreground.

Now combine the two in a simple way. I like to say that a good photograph is a subject, a context, and nothing else. Remove any clutter that detracts from your message. Get closer -- zoom in -- and crop as tightly as possible.
Subject Placement. The placement of your subject in the frame denotes its relevance to the context. The center of the frame is the weakest place -- it's static, dull, and gives no value to the context. The more you move the subject away from the center, the more relevance you give to the context; so juggle until you get the right balance. Each item has a 'weight' and, like a waiter filling up a tray, you need to balance the weights within the frame.

Lines and Paths. Create impact by using real or inferred lines that lead the viewer's eye into and around the picture. Railway tracks, rivers, and fences are obvious choices, but there are also inferred lines from the subject to the context. Lines have subtle effects. Horizontal lines are peaceful; diagonals are dynamic or tense; and curves are active and sensuous. You can also connect lines in a path or shape, such as a triangle.

A picture is a playground for the eyes to explore, so provide a path of movement, and some space for the eye to rest.

Sunday 13 January 2008

How To Take Better Photographs Of People

Of all the various subjects, people reliably make the best photographs. Nothing is more fascinating to us than other people. A good 'people' photograph shows character, emotion and a connection for the viewer. Here are some tips to help you take great shots of the people in your life.

Subject Placement. The biggest mistake many photographers make is to try to shoot a person's whole body, head to toe. Don't attempt this, unless clothes are important (such as a uniform). Instead, focus on the face. The eyes and mouth are the most important features, so start there and work out until you have just enough to represent the individual(s). Crop tightly, and don't be afraid to overflow the frame with the person's face.

Lighting. A standard lighting technique is to position yourself so the sun is behind you and to one side. This arrangement will shine light on the subject's face, while the slight angle will produce shadows to illuminate form. A better approach is to put your subject in a shady area with a shadowed background. Unlike the human eye, photographic film can't easily handle bright areas and dark shadows, as in direct sunlight, so use the shade for a narrow tonal range. Overcast days are usually best for portraits. Use the flash ('fill-flash' or 'daylight flash') to add light to the face and fill in shadows.


Lenses. Use a long lens such as 135mm - the 'people' lens. A wide-angle distorts the face, although it can be effective for parties. Find a simple, mid-toned background and use a wide aperture to throw it out of focus. I like to use tree leaves or a wall as a background and a 200mm lens set to f2.8. Center the eyes in the shot, not the head, to provide balance in the shot. When photographing children, crouch down so that you're shooting at their eye-level.

Setting The Scene. Try to set-up your camera ahead of time rather than making people wait. Help relax your subjects by engaging them in conversation. Get them to laugh or smile with a joke from the day. Finally, be sure to put yourself in the shot -- that's what the self-timer is for!

What Makes A Perfect Photograph?

Four elements are common to all good photographs: simplicity, composition, lighting, and practice.


Simplicity is actually a deceptively difficult element to capture. What you as a photographer need to do is let the camera help you simplify the things you see in front of you. You begin with a very busy canvas (everything in view) and have to work to simplify by eliminating some of the contents. You can do this either by getting physically closer to your subject, or by using a telephoto lens to zoom in and crop the shot tighter. When you photograph a person, for example, photograph his or her face only, rather than the whole person.

Composition is equally important. An artist's technique, called the "golden mean," is to divide the picture into imaginary thirds both vertically and horizontally, like a tic-tac-toe board. Then, place the subject of the photo on or near those imaginary lines or their intersections. Study photographs that you like and you'll see that almost every one has thirds that you can find.

Lighting is the third key ingredient. Photos that win competitions almost always show a skilled use of light. Try to photograph only at dawn, in the late afternoon, and at dusk, when the low angle of the sun produces rich, warm colors and long shadows. Avoid shooting at noon, a time when light is very "flat."

Practice: Taking photographs that you like won't take a lot of special, expensive equipment. But it will take lots of trial and error. Even professional photographers take many photographs of the same subject to get just one that they like. Remember, only practice makes perfect!